Last updated November 17, 2026








Free written scope consultation - allowances, timeline, and change-order rules on paper before a single trade is scheduled
Home Renovation Troubleshooting: Common Problems and How to Fix Them
A new interior door that won’t latch after a renovation isn’t a door problem. It’s a framing problem that the door is telling you about. That’s the thing nobody explains before the hammers start: remodeling problems almost never show up all at once. They send letters first. A door that sticks in July, a hairline crack in the grout, a breaker that trips when the microwave and toaster run together. Most homeowners dismiss these as quirks of an older house. They’re actually early warnings, and they’re cheapest to fix in the first few months after a project closes. This guide teaches you to read them, decide what’s normal, and build a punch list that catches real problems before your contractor leaves the job in Whitney.
Quick Answer
Most post-renovation problems are either normal settling (nail pops, hairline grout cracks, doors that stick slightly with the seasons) or a rough-in mistake you can catch early if you know the symptoms. Read the signals in the first 90 days: sticking doors and windows usually point to framing or humidity, tripping breakers point to a circuit problem, and slow drains in new fixtures point to debris or a slope issue. Anything that keeps getting worse past six months deserves a professional look.
Styles & brands we work with
- Kitchen remodeling
- Bathroom remodeling
- Home additions & ADU
- Roofing
- Windows & doors
- Driveway & pavers
- Fence
Table of Contents
- Why Do Doors and Windows Stick After a Renovation?
- Nail Pops and Grout Cracks: Settling or Something Worse?
- How to Tell Normal Settling from Structural Movement
- HVAC and Ventilation Problems That Surface After Remodeling
- Electrical Signals That Suggest a Rough-In Problem
- Plumbing Warning Signs After New Fixtures Go In
- How to Build a Punch List That Actually Catches Problems
Why Do Doors and Windows Stick After a Renovation?
A door that sticks after a remodel is usually responding to one of three things: the framing moved, the humidity shifted, or the door was installed out of square to begin with. In Whitney, our dry desert air swings hard between summer and winter, and wood and drywall both expand and contract with it. A door that binds a little in August often frees up by October with no fix at all. That’s the harmless version.
The version that isn’t harmless shows up fast and doesn’t let up. If a door won’t latch the week after the drywall went up, the opening was likely framed out of plumb or the header sagged. If a window won’t close and you can see daylight at one corner, the frame is racked. Both are framing issues wearing a door costume, and the door is doing you a favor by announcing them early.
Here’s how we walk homeowners through it:
- Check the gap around the door. A consistent 3/16-inch gap on all sides is healthy. A gap that’s wide at the top and tight at the bottom means the frame is out of square.
- Watch the calendar. If the sticking comes and goes with the seasons, it’s humidity and it usually settles. If it’s constant or worsening, it’s mechanical.
- Look for cracks radiating from the corners. Drywall cracks at the top corners of a door frame often mean the header is moving.
- Test the latch. A strike plate that misses the hole by half an inch is an install problem, not a settling problem.
If any of this is already beyond the “watch it” stage, the next step is a professional assessment. Our General Contractor in Whitney team handles the structural side of these calls routinely.
Nail Pops and Grout Cracks: Settling or Something Worse?
Nail pops and small grout cracks are the two most common complaints after any renovation, and the good news is that most of them are cosmetic and cheap to fix. A nail pop is a screw or nail backing out of the stud just enough to push a small bump through the paint. It’s caused by lumber drying and shrinking after the drywall goes on, and it’s so common that most contractors expect a handful of them.
Grout cracks follow the same logic. Movement in the substrate, slight settling of floor tile, or the natural cure of mortar all cause hairline cracks. What separates the harmless from the concerning:
- Nail pops scattered across the room in the first year: usually normal shrinkage.
- Nail pops in a straight vertical line above a doorway or along one stud line: check the framing.
- Hairline grout cracks in a few joints: normal, easily regrouted.
- Cracks running the full length of a tile line, or tile that sounds hollow when tapped: likely a substrate or thin-set problem.
- Grout cracking around the perimeter of a shower pan: stop and call someone. That’s a water-intrusion risk, not a cosmetic one.
One trade detail worth knowing: a proper shower build relies on Schluter edge trim and waterproofing membranes behind the tile, not on the grout itself. Grout is not waterproof. If water is finding its way behind the tile because of a crack in a wet area, you want it addressed before it reaches the framing. This is the general category of problem where catching it in month two costs a few hundred dollars and catching it in year two costs several thousand.
How to Tell Normal Settling from Structural Movement
Every house settles. New construction settles more in the first two years, and renovated spaces settle as new lumber and framing adjust to the home’s existing structure. The trick is separating the normal settling from movement that signals a real structural problem. In our experience on jobs across Whitney, the tell is almost always the pattern and the direction, not the size.
Normal settling looks like this:
- Hairline, diagonal cracks smaller than a hair’s width
- Doors and windows that stick slightly in one season and free up in another
- Small gaps where new drywall meets old drywall
- Cracks that appear once, within the first year, and then stop
Structural movement looks like this:
- Cracks wider than a quarter-inch, or cracks that grow month over month
- Cracks in a stair-step pattern across brick or block
- Doors and windows that bind more every month, not less
- Floors that slope or feel soft underfoot
- Separations at the ceiling-to-wall line, especially on exterior walls
The practical test is time. Take a dated photo of the crack with a ruler next to it. Check the same spot in 30 days and again in 60. If it hasn’t widened, you’re almost certainly fine. If it has, the cause is worth finding. A professional assessment early on saves you from patching cosmetic cracks that will just reappear. For the full scope of what a whole-home renovation involves and where these problems typically surface, see our Sawyer Remodeling Whitney home page.
HVAC and Ventilation Problems That Surface After Remodeling
This is the most overlooked consequence of any renovation, and it’s the one we spend the most time explaining to homeowners after a job. When you change room configurations, add closets, remove walls, or convert a space, you change the airflow the home’s HVAC system was originally balanced for. A return vent that was fine when a hallway was open to the living room no longer moves the air it used to once a wall goes up.
What that looks like in practice:
- One room runs noticeably hotter or colder than the rest of the house
- New closets or enclosed spaces get musty
- Bathroom fans leave condensation on mirrors longer than before
- A kitchen range hood doesn’t clear smoke and odors the way it should
- The HVAC system runs longer to reach the same temperature
The fix usually starts with a load calculation and a room-by-room check of supply and return air. Sometimes it’s a new return register. Sometimes it’s adjusting dampers. Sometimes it’s a bigger conversation about the system’s size. Range hoods and bathroom fans matter more than people think because modern homes are built tight, and a hood that vents poorly can pull moisture and cooking byproducts into the wrong places.
We build ventilation checks into every renovation plan precisely because retrofitting them later is disruptive. The most common oversights we see from other contractors, whether in Whitney kitchens or whole-home projects, are undersized exhaust fans in bathrooms (a proper one moves at least 100 CFM for a standard bath) and range hoods ducted to the wrong length or with too many elbows.
Electrical Signals That Suggest a Rough-In Problem
A breaker that trips after a renovation is doing its job. It’s telling you the circuit is overloaded or something downstream is drawing more current than it should. Either way, this is one area where the safety caveat matters: if a breaker trips more than occasionally, if you smell burning near an outlet or panel, or if any outlet or switch feels warm to the touch, stop using that circuit and call a licensed electrician. Electrical work is not a DIY troubleshooting exercise. We don’t walk homeowners through panel work, and you shouldn’t either.
What you can do is observe and describe. These signals point to a rough-in issue worth investigating:
- A breaker trips when two specific appliances run together. That’s a load calculation problem, often because a new appliance (a microwave, an EV charger, a space heater) was added to a circuit that wasn’t sized for it.
- Lights dim when a large appliance kicks on. Usually a loose neutral or a shared circuit.
- GFCI outlets trip repeatedly in a new bathroom or kitchen. Sometimes moisture, sometimes a wiring fault. Worth a look.
- An outlet has a loose plug fit. The receptacle may be worn or miswired during the install.
- There’s a buzzing at the panel. Call an electrician. Don’t wait.
In renovated bathrooms especially, the combination of moisture and new circuits makes GFCI protection non-negotiable, and it’s required by current code. If you’re planning a bathroom project and want to know what the electrical scope should include upfront, our Bathroom Remodeling in Whitney page walks through it.
Plumbing Warning Signs After New Fixtures Go In
A slow drain in a brand-new sink is not normal, and anyone who tells you to “give it time” is guessing. New fixtures should drain faster than old ones, not slower. If they don’t, you’re looking at one of three things: construction debris in the trap or drain line, a slope problem in a new drain run, or a venting issue that’s causing the drain to gurgle and stall.
Here are the plumbing signals worth paying attention to in the first few months:
- Inconsistent water pressure from fixture to fixture, or between hot and cold on the same fixture. That usually points to a partially closed valve, debris in an aerator, or a supply line sized wrong.
- A new sink or tub that drains slowly from day one. Debris or slope. Don’t wait to see if it clears.
- Water staining or discoloration on ceilings below a newly plumbed bathroom. Stop and call someone. That’s a leak, not a settling issue.
- A toilet that rocks slightly or squeezes water at the base when you sit. Usually a wax ring and flange issue from the install.
- Hot water that takes much longer to arrive than it did before the project. Could be a new run of pipe without insulation or a recirculation change.
On new cabinetry work, where we install KraftMaid or Wellborn lines, we always check the under-sink shutoffs before the cabinets close up. If a fixture refuses to cooperate after a project, a free second visit under our 365-Day Done Right Promise is the standard, not an argument. Plumbing failures inside a wall are the most expensive thing on this list if they go unnoticed, so treat the early signs seriously.
How to Build a Punch List That Actually Catches Problems
The punch list is your last chance to catch problems while the contractor still has a crew on-site. A weak punch list is a list of things you noticed. A good punch list is a list of things you tested. The difference is the difference between catching a problem now and discovering it three months after the job closes.
Plan to spend a full hour walking the project room by room, at two times of day (morning and evening) so you see the light at different angles. Here’s the sequence we recommend:
- Test every door and window. Open, close, latch, and lock each one in the renovated space. Note any that stick, miss the strike, or need extra force.
- Run every fixture. Turn on all taps, run hot and cold, flush every toilet, and watch the drains. Time how long each takes to drain.
- Switch every outlet and light. Plug a phone charger into each outlet. Flip each switch. Confirm no two switches control the same load by accident.
- Run the HVAC through a full cycle. Heat on, heat off, cool on, cool off. Stand in each room and feel for airflow from every register. Note temperature differences between rooms.
- Look at every seam. Walk the wall-to-ceiling line, the wall-to-floor line, and every grout joint with a flashlight held at a low angle. That’s how you find corners that aren’t square and grout that’s already cracked.
- Photograph everything. Date-stamp the photos. You’ll want them for reference in a month when you’re checking whether a crack grew.
- Put it in writing before you sign off. Each item gets a description, a photo, and a target fix date. The written price and timeline you approved should be the reference point when you review the punch list.
If you’re planning a kitchen project, our Kitchen Remodeling in Whitney guide covers what belongs on that room’s punch list specifically, from cabinet hardware alignment to countertop seam quality. For bigger projects, the general contractor team walks through every punch list item with the homeowner before the final invoice goes out.
Common Mistakes to Avoid
- Dismissing a door that won’t latch as “just an old door.” If the door is new and won’t latch, the framing is out of square. Don’t let anyone talk you into a strike plate extension as the fix.
- Assuming a small crack will stop growing. It might, but you don’t know that until you check it 30 days later. Photo it, date it, and recheck.
- Signing off before drywall has fully cured. Whitney’s dry air can cause fast curing that surprises people. If the contractor pushes to sign off within a week, ask for a 30-day check-in instead.
- Letting the HVAC system run without a room-by-room airflow check. This is the biggest oversight we see from other contractors. A room that runs hot or cold after a renovation isn’t a “new normal,” it’s a balance problem.
- Ignoring a slow new drain. New plumbing should never drain slowly. If it does, it’s debris or slope, and you want it fixed while the contractor is still listening.
- Not asking for the paperwork. Permits, inspection sign-offs, and material warranties are part of the job, not extras. If the contractor can’t hand them over, that’s a warning.
- Treating a written price as optional. No work should start without one. If a contractor wants to “get started and figure out the price later,” that’s your sign to walk.
See the difference
 Before
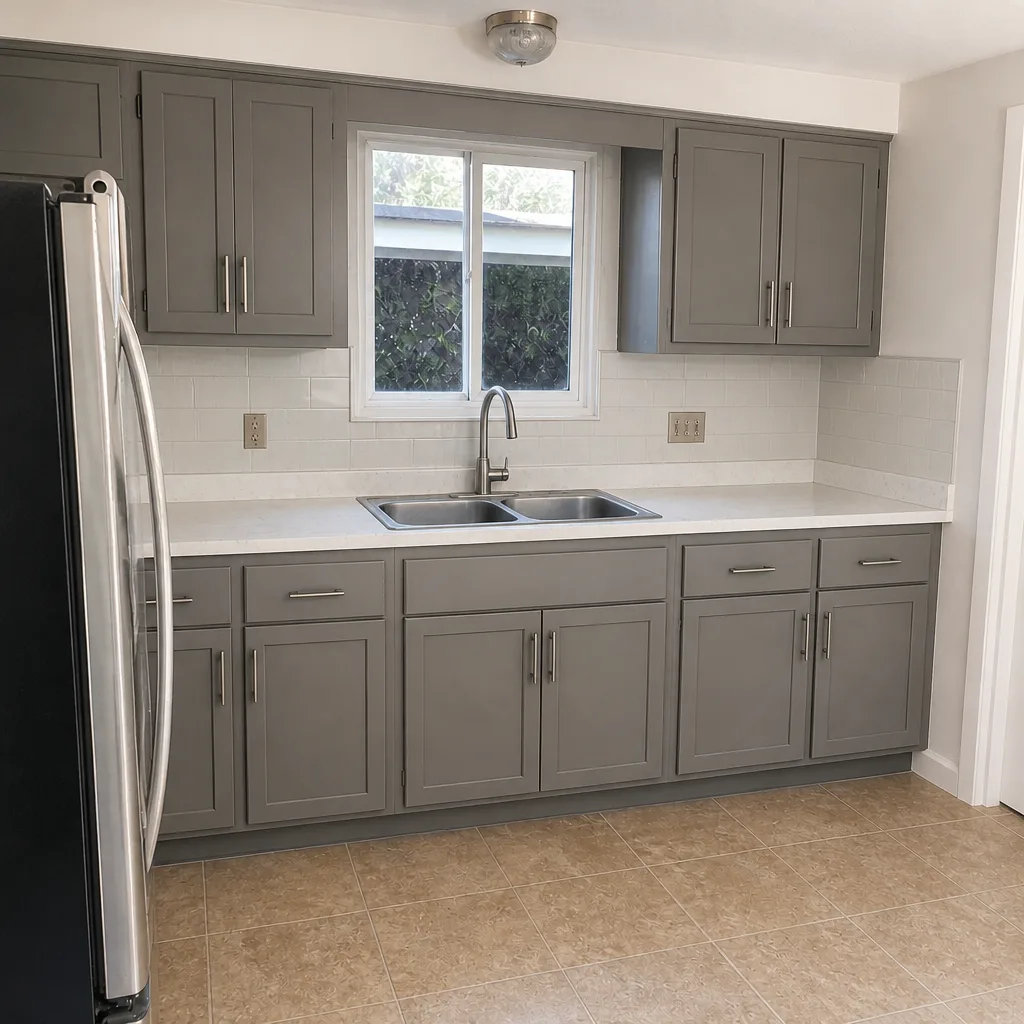 After
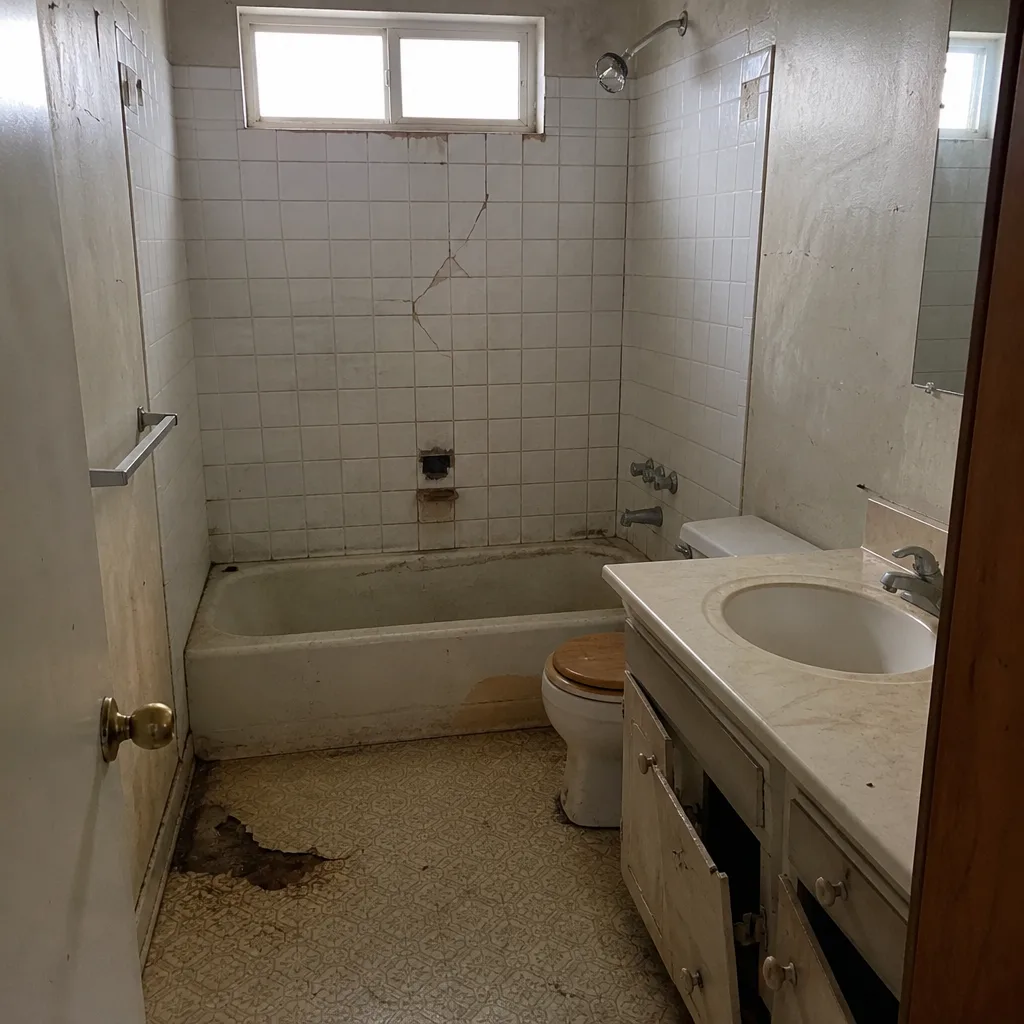 Before
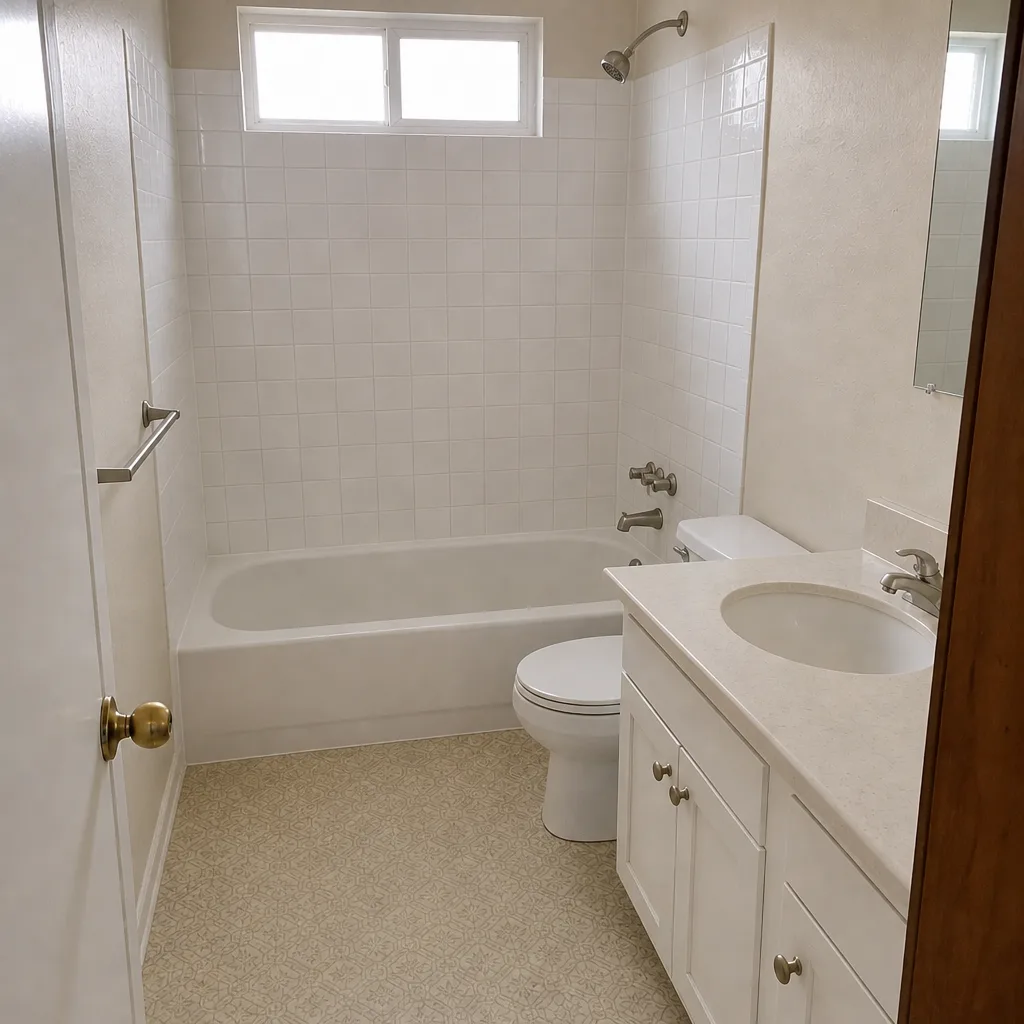 After
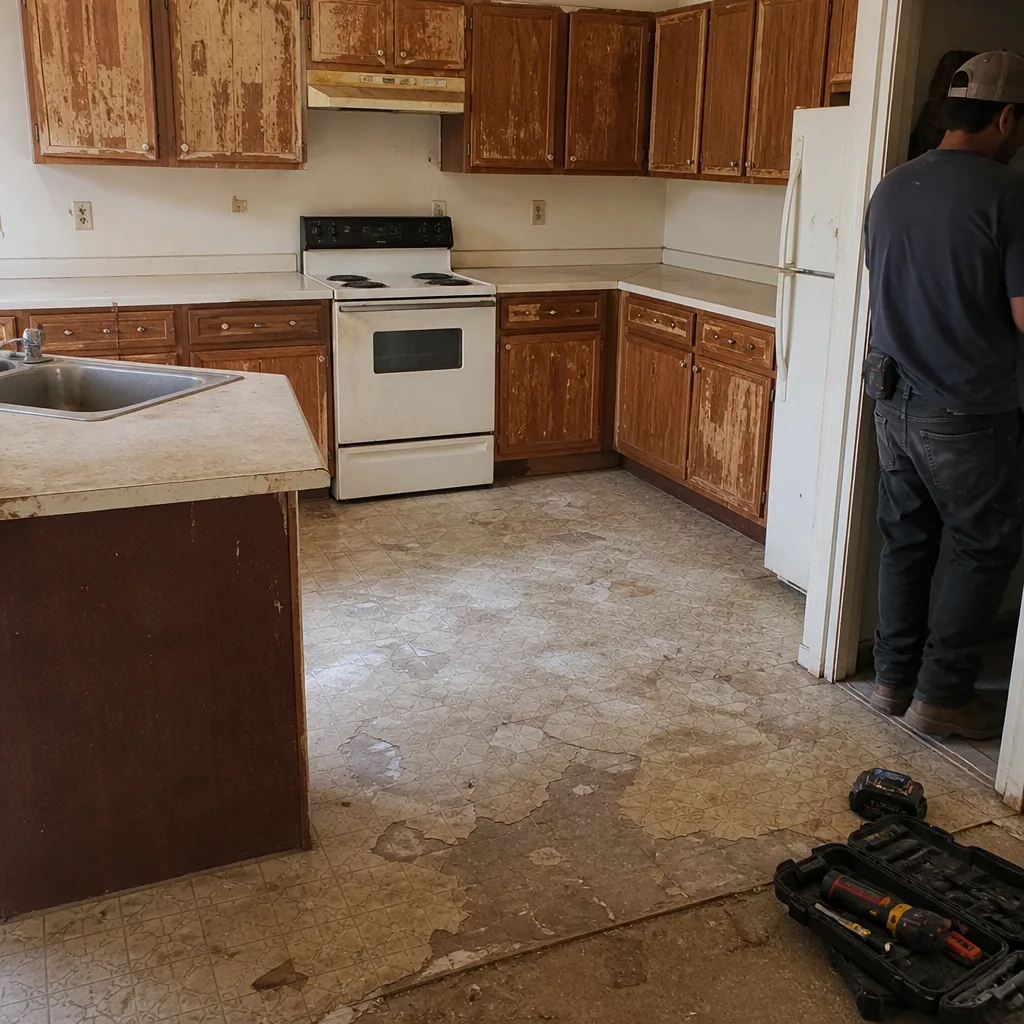 Before
 After
When to Call a Professional
Some of the signals in this guide are DIY-fixable, and some aren’t. Call a professional if any of the following apply: a crack wider than a quarter-inch that’s still growing; a door or window that binds more each month; water staining on any ceiling or wall below a remodeled space; a breaker that trips more than occasionally, or any outlet or switch that feels warm; a slow drain in a fixture that was just installed; or any moisture smell in a newly finished space that won’t clear with ventilation. Those are the cases where waiting costs more than calling. Electrical, plumbing, and framing problems that look small in month two are expensive in year two, and they’re the reason Sawyer Remodeling Whitney offers free estimates in Whitney – call (833) 570-8789 to schedule a walk-through and put a written plan around the fix.
Frequently Asked Questions

Sticking doors after a renovation usually mean the framing moved, the humidity shifted, or the door was installed out of square. A consistent 3/16-inch gap says the install is fine. A gap that’s wide at the top and tight at the bottom means the frame is out of square. If the sticking is seasonal, it’s likely humidity; if it’s constant or worsening, it’s structural framing that needs a look.
Nail pops are usually cosmetic and normal in the first year, caused by lumber shrinking after the drywall goes up. They’re a concern if they appear in a straight vertical line above a doorway or along a single stud line, which can signal framing movement. Call (833) 570-8789 for a free estimate if the pattern looks off.
Thirty to sixty days of tracking is usually enough. Photograph the crack with a ruler next to it, then recheck at 30 days and 60 days. If it hasn’t widened, it’s almost certainly settling. If it has grown or it’s wider than a quarter-inch, it deserves a professional assessment. Call (833) 570-8789 for a free estimate.
Yes, especially if you changed room configurations, added walls, or converted a space. The original HVAC balance was designed for the old layout, and new walls change how air moves through the home. A room-by-room airflow check after drywall goes up catches most of the problems before they become chronic. Call (833) 570-8789 to schedule one.
Test every door, window, fixture, outlet, and HVAC register in the renovated space, then photograph each with a date stamp and put every item in writing before you sign off. Whitney’s dry climate makes settling-related cracks and drywall gaps show up fast in the first weeks after a project, so plan a 30-day check-in with your contractor rather than treating sign-off as the final conversation.
That’s what a written guarantee is for. A written price, a 365-Day Done Right Promise, and a stated process for post-project check-ins are the things that separate a contractor who answers the phone from one who ghosts. If you’re still choosing a contractor, ask for those in writing before you sign. Call (833) 570-8789 for a free estimate and to see what our version looks like.
The Bottom Line
Renovation problems almost never arrive without warning. Sticking doors, hairline grout cracks, nail pops in a vertical line, a room that runs hot, a new drain that’s slow on day one: each of these is a letter, not an ambush. Read them early, track them with photos, and put a punch list in writing before your contractor leaves the job. The homeowner who catches a slow drain in month two spends a few hundred dollars. The one who catches it in year two spends a few thousand. Our general contractor team in Whitney builds the check-ins into every project, because the goal isn’t just a good install, it’s a renovation that holds up for the long haul.
If you’re planning a project or working through problems from one that’s already done, call (833) 570-8789 for a free estimate. We’ll walk the space, read the signals with you, and put a written plan in front of you before any work starts.
Written by the team at Sawyer Remodeling Whitney.