
Last updated November 17, 2026








Free written scope consultation - allowances, timeline, and change-order rules on paper before a single trade is scheduled
Kitchen Remodeling Maintenance Schedule: What to Do and When
Cabinet hinges need adjustment after 60 to 90 days of regular use. Grout sealer on a new tile backsplash typically needs its first reapplication within the first year. Undermount sink clips settle under the weight of daily use, and that faint rattle you hear when you close a drawer is alignment drifting a millimeter at a time. None of this is defective workmanship. It’s physics. A freshly remodeled kitchen is on a clock, and the first 90 days are when you catch small settling before it becomes a callback, and when you complete the manufacturer-required maintenance that keeps your warranties valid. Most homeowners skip this window entirely, because nobody told them it existed. This guide lays out exactly what to do, and when, so your Whitney kitchen stays as tight in year two as it looked on day one.
Quick Answer
Maintain a newly remodeled kitchen on three cycles: a 90-day settling inspection (hinges, drawer alignment, grout, caulk, appliance leveling), a twice-yearly upkeep pass (ventilation, countertop sealing, hardware tightening), and annual deep checks (appliance connections, caulk re-sealing, finish care). The first 90 days matter most, because installation settling happens then and most manufacturer warranties require documented maintenance to stay valid.
Styles & brands we work with
- Kitchen remodeling
- Bathroom remodeling
- Home additions & ADU
- Roofing
- Windows & doors
- Driveway & pavers
- Fence
Table of Contents
- The First 90 Days: Your New Kitchen Checklist
- Hinges, Drawers, and Hardware: The Settling Clock
- Grout and Caulk: Where Water Finds a Way
- Countertop Care by Material: Quartz vs. Granite vs. Laminate
- Ventilation: Filters, Ductwork, and Why Heat Matters in Whitney
- Cabinet Finish Care by Door Style and Material
- When to Call a Plumber vs. Handle It Yourself
- Appliance Leveling and Connection Checks
The First 90 Days: Your New Kitchen Checklist
The 90-day window is the most important maintenance period of your kitchen’s life, and it’s the one almost everyone misses. Wood and composite materials expand and contract as they adjust to your home’s humidity. Hinges take a few hundred open-and-close cycles to settle. Grout and caulk cure and shift slightly as the substrate beneath them moves. This isn’t a sign of a bad install. It’s normal, and it’s manageable if you know what to look for.
In Whitney, where summers run hot and dry and the air conditioning runs hard, we see this settling play out a little faster in the warm months. The indoor humidity swings between a conditioned interior and the dry desert air, and materials react. That’s why timing your first inspection to around day 90, rather than day 30, gives everything time to actually move.
Here’s the checklist we walk homeowners through:
- Adjust every cabinet hinge. Open and close each door. If a door rubs, hangs crooked, or drifts open, the hinge needs a quarter-turn on its adjustment screw.
- Realign drawers. Pull each drawer fully out and push it back. A drawer that sticks or sits uneven is usually a simple slide adjustment.
- Inspect grout lines on the backsplash and any tile floor. Look for hairline cracks, especially where the backsplash meets the countertop.
- Check caulk at the sink and backsplash. Press along the seam. Any gap, peeling, or soft spot means it’s time to remove and re-caulk.
- Verify appliance leveling. A refrigerator that rocks, a range that tilts, or a dishwasher that pools water all point to feet that need adjustment.
- Test the range hood. Hold a tissue near the filter at full speed. If it doesn’t pull toward the vent, airflow is restricted.
If you had your kitchen remodeled recently, this is exactly the kind of settling a contractor should be willing to check and correct. It’s also why kitchen remodeling in Whitney should include a walkthrough conversation about what to expect after the crew leaves. A kitchen that’s installed right still moves, and a good contractor tells you so up front.
Hinges, Drawers, and Hardware: The Settling Clock
Cabinet hardware is the first thing to drift and the easiest to fix. A European-style concealed hinge has two or three adjustment screws – one for depth, one for side-to-side, one for up-and-down. After 60 to 90 days of daily use, most hinges need a small tweak. This is true whether you chose KraftMaid cabinetry or another brand; the mechanics are the same, and the settling is universal.
Drawers follow a similar pattern. A drawer that glides perfectly on day one can feel sticky by month three because the slides have worn in slightly or the cabinet face has shifted a fraction of an inch. The fix is usually a screwdriver, not a new drawer.
What to check, and in what order:
- Door rub at the top or bottom: adjust the hinge up/down screw a half-turn at a time.
- Door gaps uneven side to side: adjust the side screw on one hinge, then recheck both.
- Soft-close mechanism slowing or speeding up: most have a small dial to tune closing speed.
- Drawer face crooked: loosen the screws holding the drawer front to the box, realign, retighten.
- Handles and pulls loose: a Phillips screwdriver every six months keeps them snug.
Our technicians have up to 21 years of experience adjusting and reinstalling cabinetry, and the single most common reason a cabinet “feels cheap” after a remodel is that nobody came back at 90 days to make these small corrections. It’s not the cabinet. It’s the settling.
Grout and Caulk: Where Water Finds a Way
Water damage in a kitchen rarely announces itself. It starts as a hairline crack in grout behind the sink, works into the substrate, and shows up a year later as a soft spot or peeling paint on the wall behind the backsplash. Catching it at the grout-and-caulk stage is cheap. Catching it after the substrate is wet is a repair.
Grout sealer on a new tile backsplash typically needs its first reapplication within the first year, and in a dry climate with heavy indoor/outdoor temperature swings, we’ve seen it need it sooner. Caulk at the sink perimeter and where the backsplash meets the countertop is the highest-risk seam in the kitchen, because it’s where standing water sits longest.
Your grout and caulk schedule:
- Day 90: walk every grout line. Look for cracks, especially vertical ones in corners.
- Month 6: test caulk seams by pressing gently. Soft or separated caulk should be replaced.
- Annually: re-seal grout. A penetrating sealer applied every 12 months keeps tile stain-resistant.
- Immediately after any leak or overflow: inspect and re-caulk the affected seam before it dries out.
When we handle bathroom remodeling in Whitney, the same grout and caulk rules apply, and the stakes are higher because of shower water. The habit you build maintaining kitchen grout is the same one that protects a bathroom. Learn it once and it covers both rooms.
Countertop Care by Material: Quartz vs. Granite vs. Laminate
Not every countertop wants the same care, and using the wrong product can dull a finish permanently. Here’s how the three most common materials differ.
- Quartz (Cambria, Silestone, Caesarstone): non-porous, doesn’t need sealing, and is vulnerable to heat. Never set a hot pan directly on it – use a trivet. Clean with mild soap and water or a quartz-specific cleaner. Avoid abrasive pads, which scratch the surface.
- Granite: porous, so it needs sealing every 12 to 18 months depending on use. Test by dropping water on a small spot; if it darkens quickly, it’s time to re-seal. Avoid acidic cleaners, which etch the stone.
- Laminate: no sealing needed, but heat and standing water are its enemies. Wipe up spills promptly, especially at seams, and always use a cutting board – a knife slip means permanent damage. Mild cleaner only.
The most common mistake is treating all three the same. A homeowner who’s only ever had laminate reaches for an abrasive cleaner on new quartz and dulls it. A homeowner used to quartz forgets that granite needs sealing, and stains set in. Match the care to the countertop and you’ll get a decade or more of good appearance out of any of them.
When we source surfaces for a Whitney kitchen, we work with a range of manufacturer-backed brands so the care instructions come straight from the maker and the warranty stays valid. You should never have to guess what a surface is made of. It should be written down for you.
Ventilation: Filters, Ductwork, and Why Heat Matters in Whitney
Range hood maintenance matters more here than in most places, and it’s the item people skip the longest. A Whitney summer means the air conditioning runs constantly, so the hood is the main way cooking heat and moisture leave the kitchen instead of getting trapped and re-cooled. A clogged filter forces the hood to work harder and pushes grease-laden air back into the room.
What to do, and how often:
- Clean or replace the grease filter every 1 to 3 months depending on how often you cook. Many are dishwasher-safe; check the manufacturer’s instructions.
- Inspect ductwork annually. Look for disconnected joints, crushed flexible duct, or grease buildup. Restricted airflow is the number one cause of poor hood performance.
- Check the exterior damper once a year. A stuck damper can let hot attic or outdoor air back into the kitchen.
- Clean the hood’s exterior monthly with a degreaser – grease film builds up and can discolor a finish over time.
A hood with a proper exterior vent is worth maintaining because it’s doing real work in a hot climate. When we run general contractor in Whitney projects that include a kitchen, we make sure the ducting is sized correctly and vented outside rather than into the attic – a shortcut that causes problems later and is much harder to fix after the cabinets are in.
Cabinet Finish Care by Door Style and Material
Cleaning products that are fine on one cabinet finish will quietly destroy another. The single biggest cabinet killer is the wrong cleaner, applied repeatedly, on a finish that can’t take it.
- Painted cabinets: use a damp cloth with mild dish soap and water only. Abrasive cleaners and degreasers dull the paint, and repeated scrubbing around handles wears the finish thin. Wipe drips promptly – moisture sitting on paint softens it.
- Stained wood cabinets: a wood-safe cleaner or a barely damp cloth. Avoid anything with alcohol or ammonia, which strips the protective topcoat and leaves a patchy sheen.
- Thermofoil cabinets: a mild cleaner and a soft cloth. Never use abrasive pads or solvents – thermofoil is a thin laminate film, and once it’s scratched or peeled it can’t be repaired, only replaced. Keep them out of prolonged direct heat.
Whichever finish you chose, the routine is the same: dust or wipe the cabinet faces monthly, clean spills immediately, and avoid soaking any surface. A well-maintained finish lasts years longer than a neglected one, and it’s almost entirely about what you don’t use.
When to Call a Plumber vs. Handle It Yourself
Most under-sink and dishwasher connection problems in the first year are minor and can be handled with a wrench and a fresh gasket. Some are not, and knowing the difference protects your new cabinetry and your floor.
The five most common first-year issues, and what to do:
- Dripping under the sink at the supply connection: usually a loose compression nut. Tighten a quarter-turn. If it still drips, call a plumber.
- Undermount sink clips settling: a faint creak or slight movement. Re-tighten the mounting clips; if the seal is compromised, call a professional.
- Dishwasher drain hose connection leaks: check the hose clamp and the high loop. Loose clamp, tighten it. Cracked hose, replace it.
- Slow drain at the kitchen sink: often debris in the P-trap. You can clear it. Persistent clogs point to a deeper issue – call a plumber.
- Water pooling under the dishwasher: stop using it and call a plumber. This usually means a failed seal or pump, and continued use damages flooring and cabinets.
The rule we give homeowners: if it’s a loose fitting or a clog you can see, handle it. If it’s an active leak, a pooling appliance, or water you can’t trace, call a plumber. Water and new cabinets don’t mix, and a fast call is cheaper than a floor repair.
Appliance Leveling and Connection Checks
Level appliances sit in place. Unlevel appliances rock, and a rocking refrigerator or range puts stress on its own connections over time. When we install appliances, we level them at the time of install, then recommend a recheck at the 90-day mark because floors and feet settle as appliances are used.
- Refrigerator: check it doesn’t rock corner to corner. Confirm the water line behind it isn’t pinched.
- Range: a tilt means the anti-tip bracket or leveling feet need attention. Always keep the anti-tip bracket engaged.
- Dishwasher: check that it drains fully and doesn’t pool water. Verify the supply and drain lines aren’t kinked.
- Microwave and hood: confirm the vent connection is secure and the mounting is solid.
A level appliance runs quieter, lasts longer, and puts less stress on the connections that eventually leak. It’s a five-minute job you’ll be glad you did.
Common Mistakes to Avoid
- Skipping the 60-to-90-day settling check. Most installation issues appear here. Waiting until year two means small adjustments become repairs.
- Using abrasive cleaners on quartz or thermofoil. They scratch permanently. Match the cleaner to the surface, always.
- Never re-sealing grout. Grout sealer wears off within a year, and unprotected grout stains and cracks. Re-seal annually.
- Ignoring the range hood filter. A clogged filter traps grease and cuts airflow. Clean or replace it every one to three months.
- Letting caulk gaps go. A hairline gap at the sink seam lets water into the substrate. Re-caulk the moment you see separation.
- Treating granite like quartz. Granite needs sealing; quartz doesn’t. Confusing the two causes stains or wasted effort.
- Cleaning painted cabinets with degreaser. It dulls the finish over time. Mild soap and water only, and wipe promptly.
See the difference
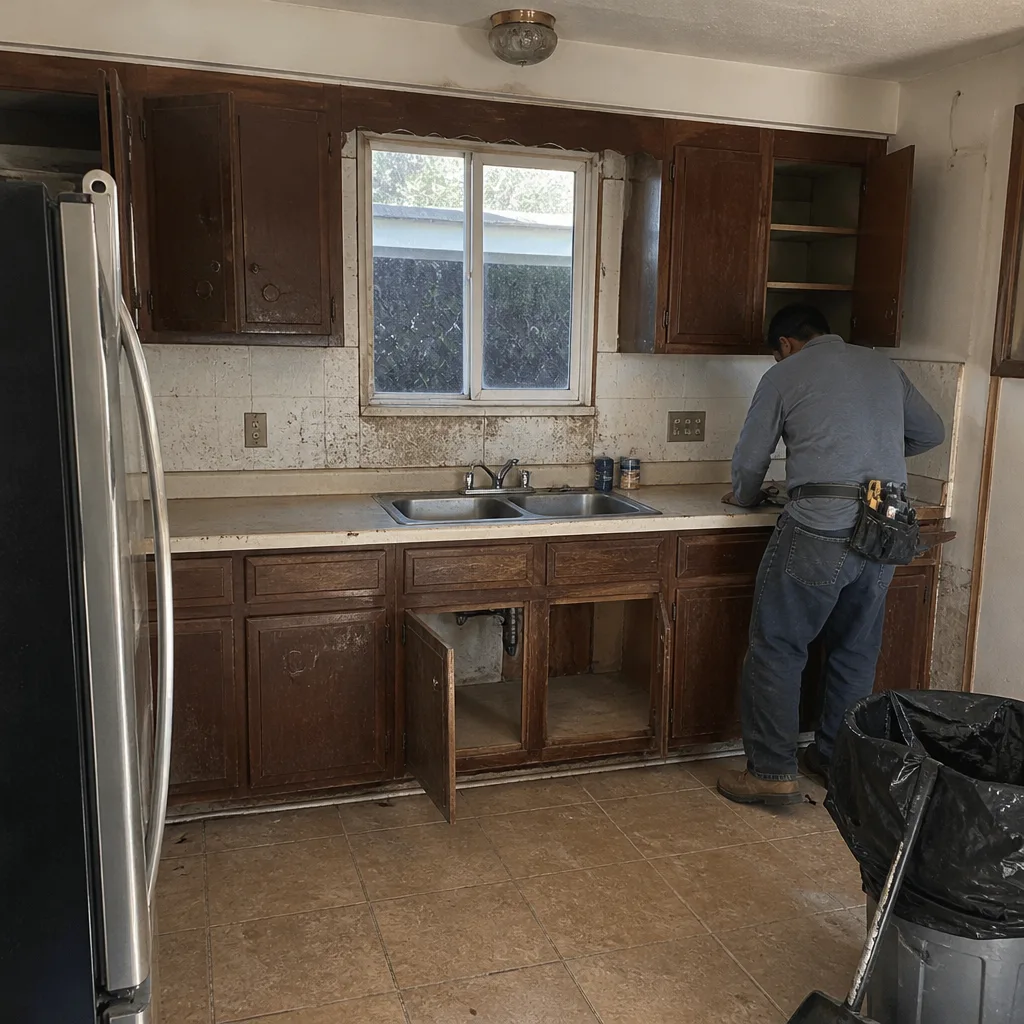 Before
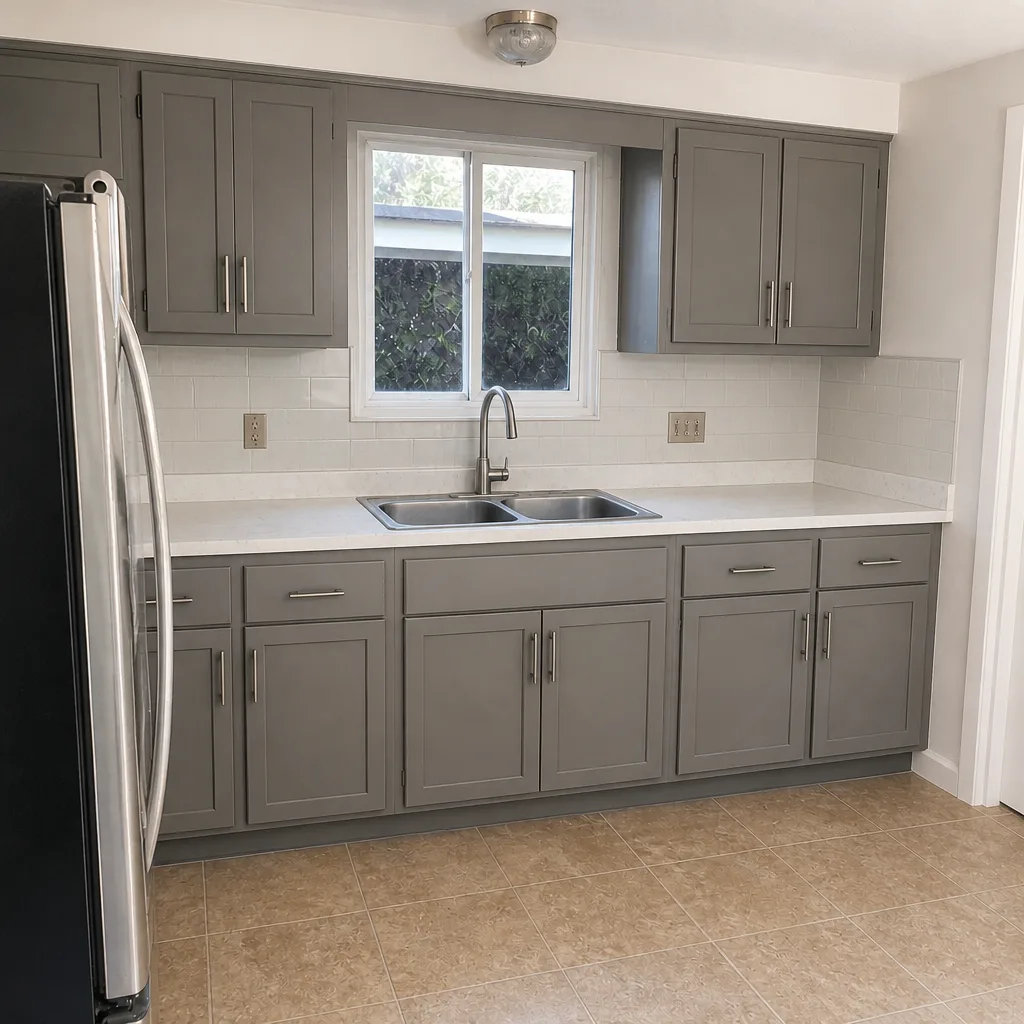 After
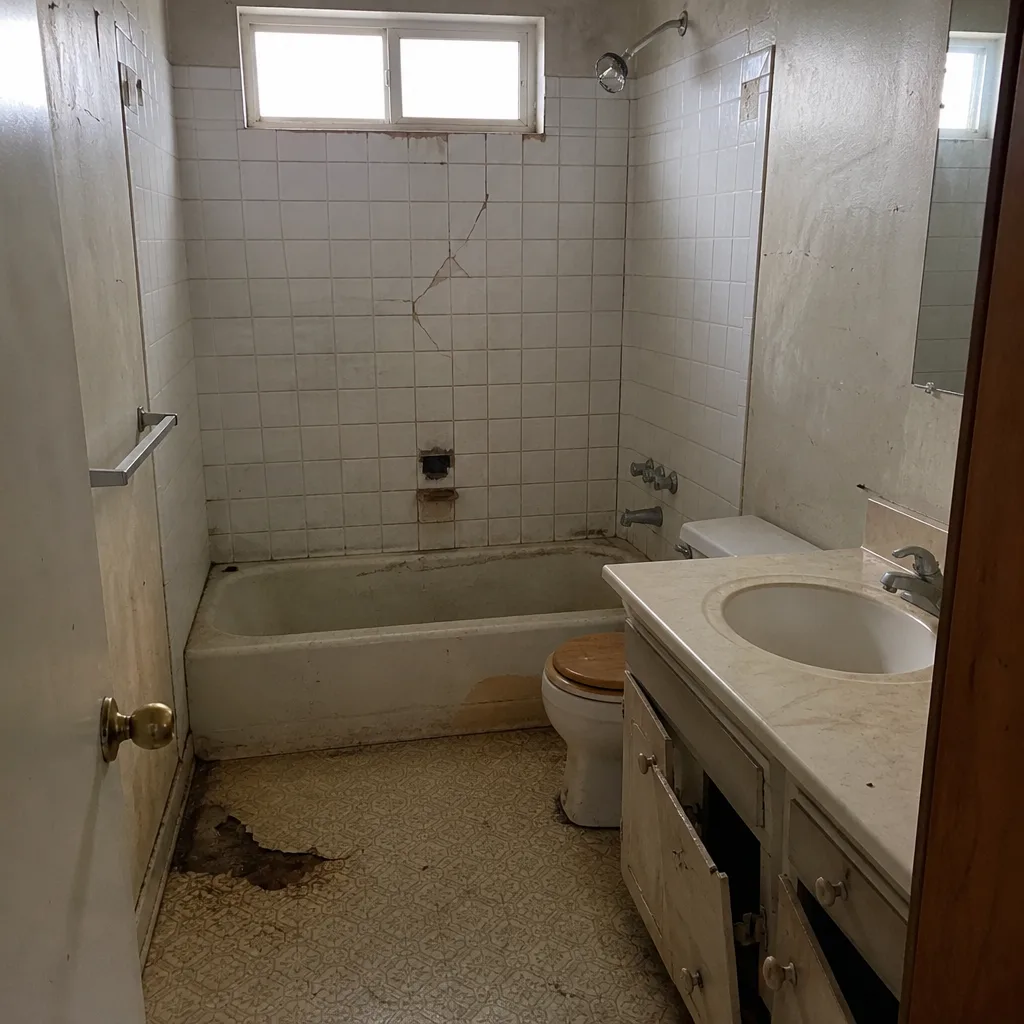 Before
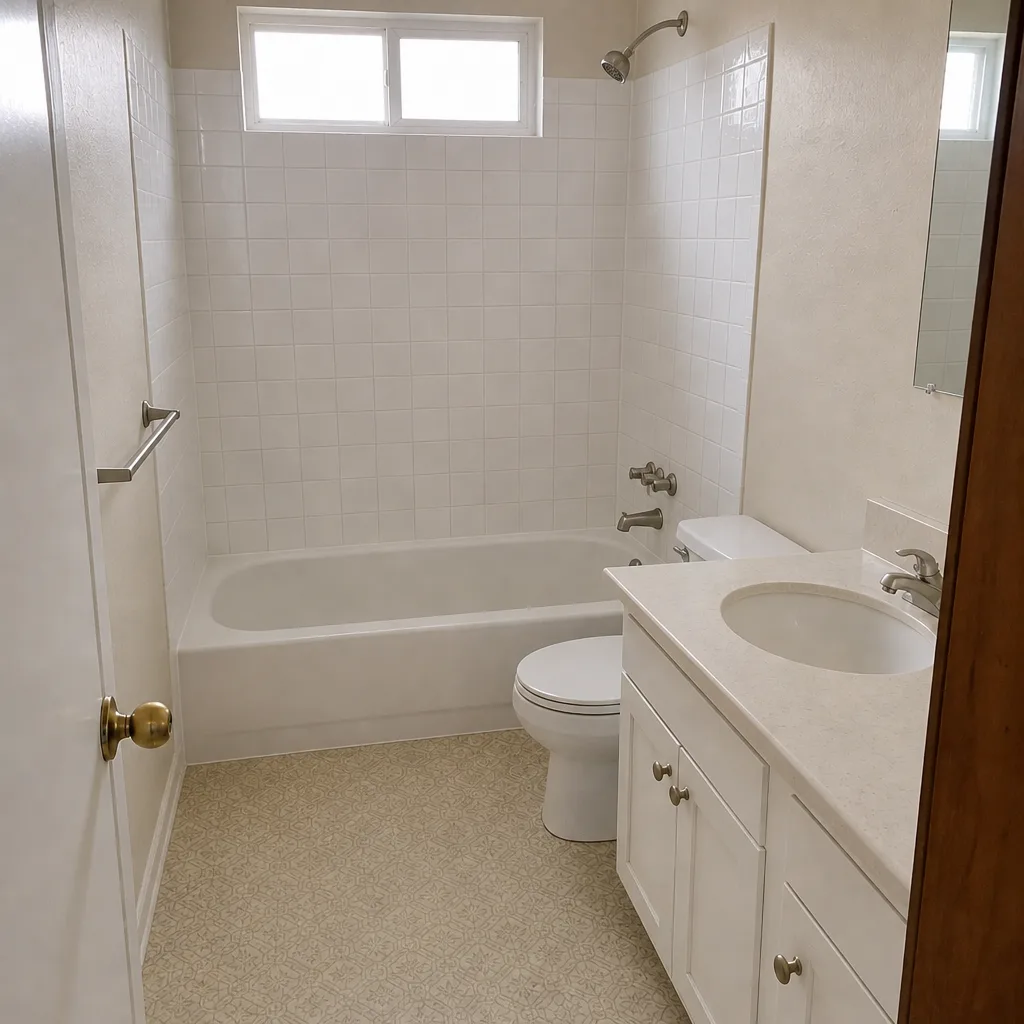 After
 Before
 After
When to Call a Professional
Some maintenance is yours to handle – tightening a hinge, re-sealing grout, cleaning a filter. But certain problems should go to a trained professional: an active under-sink or dishwasher leak you can’t trace, a cabinet door that won’t stay aligned after you’ve adjusted the hinge, a range hood that doesn’t pull air after a filter cleaning, a dishwasher that pools water, or any commercial-grade thermofoil or cabinet finish that’s peeling (it can’t be repaired, only replaced). Getting these right the first time protects your warranty and your cabinetry. If you’re unsure whether an issue is settling or something more, call and ask. Sawyer Remodeling Whitney offers free estimates in Whitney – call (833) 570-8789 to schedule yours.
Frequently Asked Questions

Do a full settling inspection at 60 to 90 days after the project closes, then move to a twice-yearly and annual schedule. The 90-day mark is when hinges, drawer slides, grout, and caulk have settled enough to reveal anything that needs a minor adjustment. Catching it early keeps small fixes from becoming repairs.
No. Quartz surfaces like Cambria, Silestone, and Caesarstone are non-porous and don’t require sealing. They do need protection from heat – always use a trivet – and should be cleaned with mild soap and water or a quartz-specific cleaner, never abrasive pads. Granite is the material that needs re-sealing every 12 to 18 months.
Clean or replace the grease filter every one to three months, depending on how often you cook. In a hot climate like Whitney’s, where the air conditioning runs constantly and the hood manages significant cooking heat and moisture, staying on the frequent end of that range keeps airflow strong and prevents grease buildup.
Handle loose fittings, visible clogs, and tightening undermount sink clips yourself. Call a plumber for active leaks you can’t trace, a dishwasher that pools water, or persistent clogs. The line is simple: if you can see and reach the problem, it’s usually a maintenance task; if water is moving where it shouldn’t, call a professional.
If a door hangs crooked, rubs, or drifts after 60 to 90 days of use, it’s almost always settling, and a hinge adjustment fixes it. If the problem persists after you’ve adjusted the hinges, or if the door or face frame is visibly damaged, it’s time for a professional to take a look. Settling is normal; structural damage is not.
It can. Many manufacturer warranties for counters, cabinets, and appliances require documented maintenance to stay valid. Re-sealing grout, cleaning filters, and re-caulking seams are exactly the tasks those warranties assume you’ll do. Keep a simple maintenance log and you’ll have what you need if a warranty claim comes up.
The Bottom Line
A newly remodeled kitchen isn’t maintenance-free – it’s on a clock. The first 90 days are when you catch settling before it becomes a callback, and when you complete the manufacturer-required care that keeps your warranties valid. Match your cleaning products to each material, re-seal grout annually, stay on top of your range hood filters, and call a professional when water or alignment problems go beyond a hand-tightening. Do those things and a well-built Whitney kitchen stays tight and good-looking for years. If you’re planning a remodel or need a settling inspection on a recent one, our team is here. Call (833) 570-8789 for a free estimate, and start with our Sawyer Remodeling Whitney home page to see how we run every project under The Relay Visibility Guarantee – a written price before work starts, a live arrival time, and photo updates before and after.
Written by the team at Sawyer Remodeling Whitney.